初自作キーボード作成(失敗)
ぼくの考えた最強のキーボードを作りたい
と思って早5年。 過去にはERGODOX EZを買おうか悩んだりしていましたが、この度自作キーボード沼へ入ることにしました。
せっせと小遣いをためて、遊舎工房様へ突撃し入門キットのmeishi2を購入

youtubeで大福先生の動画を見て勉強したつもりでさぁ開始
結果、、、
はんだ付け、難しすぎて無事死亡。

proMicroをはんだ付けするとき、めちゃくちゃ斜めになった。
そして、大福先生の動画だと、PCB側にハンダは不要です。と言っているのに、必死で変にはんだ付けしました。()()

QMK toolboxでfirmwareを書き込もうとすると、「デバイスがコマンドを認識していません。」エラー。 管理者権限で起動してみたりしましたが、改善せず。 (そりゃこんだけ斜めになってたら、だめだよね・・・) ということで、1回目の挑戦は無事失敗しました。
今回の反省
わからないことがあったら、作者様やdiscordのサーバーで質問しましょう。 (土曜の夜なんだから、先人が回答くれたかも・・・)
次回の目標!
meishi2へのリベンジ。。。(お小遣い貯めるぞい。)
ノブジィ
【テスト駆動開発】Clean Coderのメモ書き(第5章テスト駆動開発)
TDDの3原則
今回紹介する内容は以下の本を読んでの内容になります!もしよければ、皆さんも読んでみてください。
今回はClean Coderという書籍からのメモ書き
TDDの原則
- 失敗するユニットテストを書くまでプロダクションコードを書いてはいけない。
- テストを失敗させる目的以外でユニットテストを書いてはいけない。なお、コンパイルできないものも失敗に含まれる。
- 失敗しているユニットテストが成功するまで他のプロダクションコードを書いてはいけない。
メリット
- 確実性
- 欠陥混入率
- 勇気
汚い関数を修正しても、テストコードがあるから90秒後に結果がわかる! - ドキュメント
日本人が大好きな画像+テクスチャのマニュアルより、サンプルコードのほうが役に立つ!
【Vagrant】起動に失敗するとき。Stderr: VBoxManage.exe: error: Failed to open/create the internal network 'HostInterfaceNetworking-VirtualBox Host-Only Ethernet Adapter #2' (VERR_INTNET_FLT_IF_NOT_FOUND).
vagrant up実行したらエラーになったぁぁぁ!
エラーの話
過去の記事で作成したRedmineに久しぶりにアクセスしようと思い、vagrant upコマンドを叩いたところ。
こんなエラーが出てきました!

さて、何事かとエラーメッセージを見てみると、
Stderr: VBoxManage.exe: error: Failed to open/create the internal network 'HostInterfaceNetworking-VirtualBox Host-Only Ethernet Adapter #2' (VERR_INTNET_FLT_IF_NOT_FOUND).
VBoxManage.exe: error: Failed to attach the network LUN (VERR_INTNET_FLT_IF_NOT_FOUND)
VBoxManage.exe: error: Details: code E_FAIL (0x80004005), component ConsoleWrap, interface IConsole
「VirtualBox用のEthernet Adapterが見つからん」と出てますね。
そんなところ設定変更するわけないんですけど。。。
解決方法
参考にしたQuiitaの記事をもとに、ネットワークの設定を変更

IpV6のチェックを外す

一度無効にする

もう一度有効にする
そして再度vagrant up

すると無事に起動しました

【Chrome】ログイン後に「パスワードを変更してください。パスワード情報が漏洩しました!」が表示される件
パスワードを変更してください。パスワード情報が漏洩しました!
え?マジ!?と思ったら
こんなポップアップが表示されたら、ビックリしますよね!

ウイルスサイト踏んだか!?とか色々警戒しましたが、Googleの機能の一つのようです
Chromeの公式ページに記載されていますが、Password Checkup extensionという機能で出力される警告です

この警告が出るのは、
「サイトにログインする際に使用したIDとパスワードが世間に情報漏洩している組み合わせの場合」
です。
逆に考えると、chromeで入力したIDとパスワードは一回Googleさんに送信されてるってことか・・・()
Informationだと、誰にもバレないように暗号化しとるでーと書いていますから、一般の人は安心して良いでしょう^^
私の場合
私の場合はローカルにインストールしたPostgresqlの管理ツール「pgadmin」にログインした際に表示されました。
id:postgres
Pass:postgres
普通に考えたら、危険リストに入ってますよね。(笑)
正直焦りましたが、問題なくて良かったです。
皆さんウイルス対策ソフトはインストール済みだと思いますが、まだされていない方は、インストールしておきましょう!
こういうときの安心感が違うので。


【Redmine】VagrantとDockerを使って簡単に構築
VagrantとDockerを練習しよう
今回の記事の目的
VagrantとDockerを使用して、ローカル環境にRedmineを構築する
ゴールは、Redmineの画面が表示されるところまで
Redmineはきっと今後の自分のタスク管理に役立つだろう。(?)
前提
- Visual Boxをインストール済み
- Vagrantがインストール済み
参考にしたサイト
Vagrant+Docker使ってRedmineを立ててみた - Qiita
構築開始
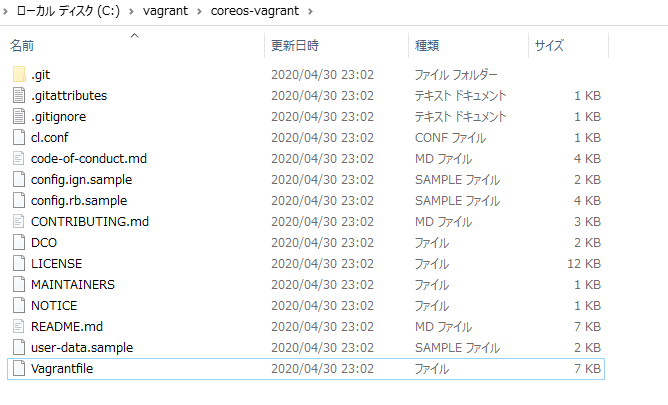
Vagrant fileをダウンロード
git からcloneしてきます
mkdir /c/vagrant
cd /c/vagrant
git clone https://github.com/coreos/coreos-vagrant.git
Vagrant fileを更新する
port forwardingを設定します
 65行目あたりに追記
Vagrant.configure("2") do |config|
  # always use Vagrants insecure key
  config.ssh.insert_key = false
  # forward ssh agent to easily ssh into the different machines
  config.ssh.forward_agent = true

  config.vm.network :forwarded_port, guest: 10083, host: 12345 # ここを追記


  config.vm.box = "coreos-#{$update_channel}"
  config.vm.box_url = "https://#{$update_channel}.release.core-os.net/amd64-usr/current/coreos_production_vagrant_virtualbox.json"

  ["vmware_fusion", "vmware_workstation"].each do |vmware|
    config.vm.provider vmware do |v, override|
      override.vm.box_url = "https://#{$update_channel}.release.core-os.net/amd64-usr/current/coreos_production_vagrant_vmware_fusion.json"
    end
  end
VagrantのDocker Provisionerの設定
Docker Provisionerを設定すると以下のことが自動でしてくれるらしい - Dockerのインストール - コンテナの実行(PostgreSQLとRedmine) Vagrantfileの以下のブロックの下に追記 config.vm.provider :virtualbox do |v|
  config.vm.provider :virtualbox do |v|
    # On VirtualBox, we don't have guest additions or a functional vboxsf
    # in CoreOS, so tell Vagrant that so it can be smarter.
    v.check_guest_additions = false
    v.functional_vboxsf     = false
    # enable ignition (this is always done on virtualbox as this is how the ssh key is added to the system)
    config.ignition.enabled = true
  end

  config.vm.provision "docker", run: "always" do |d|
  d.run "sameersbn/postgresql", args: "--name=postgresql-redmine -d \
                                       --env='DB_NAME=redmine_production' \
                                       --env='DB_USER=redmine' --env='DB_PASS=password' \
                                       --volume=/srv/docker/redmine/postgresql:/var/lib/postgresql"
  d.run "sameersbn/redmine",    args: "--name=redmine -d \
                                       --link=postgresql-redmine:postgresql --publish=10083:80 \
                                       --env='REDMINE_PORT=10083' \
                                       --volume=/srv/docker/redmine/redmine:/home/redmine/data"
  end
Vagrantを起動
次のコマンドを実行すれば完了
vagrant up
$ vagrant up
Installing plugins: vagrant-ignition
Installing the 'vagrant-ignition' plugin. This can take a few minutes...
Installed the plugin 'vagrant-ignition (0.0.3)'!
Bringing machine 'core-01' up with 'virtualbox' provider...
==> core-01: Box 'coreos-alpha' could not be found. Attempting to find and install...
    core-01: Box Provider: virtualbox
    core-01: Box Version: >= 0
==> core-01: Loading metadata for box 'https://alpha.release.core-os.net/amd64-usr/current/coreos_production_vagrant_virtualbox.json'
    core-01: URL: https://alpha.release.core-os.net/amd64-usr/current/coreos_production_vagrant_virtualbox.json
==> core-01: Adding box 'coreos-alpha' (v2430.0.0) for provider: virtualbox
    core-01: Downloading: https://alpha.release.core-os.net/amd64-usr/2430.0.0/coreos_production_vagrant_virtualbox.box
    core-01:
    core-01: Calculating and comparing box checksum...
==> core-01: Successfully added box 'coreos-alpha' (v2430.0.0) for 'virtualbox'!
==> core-01: Importing base box 'coreos-alpha'...
==> core-01: Configuring Ignition Config Drive
==> core-01: Matching MAC address for NAT networking...
==> core-01: Checking if box 'coreos-alpha' version '2430.0.0' is up to date...
==> core-01: Setting the name of the VM: vagrant_core-01_1588256146182_77216
==> core-01: Clearing any previously set network interfaces...
==> core-01: Preparing network interfaces based on configuration...
    core-01: Adapter 1: nat
    core-01: Adapter 2: hostonly
==> core-01: Forwarding ports...
    core-01: 10083 (guest) => 12345 (host) (adapter 1)
    core-01: 22 (guest) => 2222 (host) (adapter 1)
==> core-01: Running 'pre-boot' VM customizations...
==> core-01: Booting VM...
There was an error while executing `VBoxManage`, a CLI used by Vagrant
for controlling VirtualBox. The command and stderr is shown below.

Command: ["startvm", "56cfaf24-6a2e-4341-b675-e59884f23ab9", "--type", "headless"]

Stderr: VBoxManage.exe: error: Not in a hypervisor partition (HVP=0) (VERR_NEM_NOT_AVAILABLE).
VBoxManage.exe: error: VT-x is disabled in the BIOS for all CPU modes (VERR_VMX_MSR_ALL_VMX_DISABLED)
VBoxManage.exe: error: Details: code E_FAIL (0x80004005), component ConsoleWrap, interface IConsole
と思ったら、エラーが出ました・・・
BIOSの設定がダメらしい
BIOSはそれぞれのPCで設定が必要なので、ググってみてください
bios設定箇所
私のPCはなぜかsecurity>virtualizationにありました。笑
機種はthinkpad X230です

bios設定後に再度起動
vagrant up
正常終了後、少し待ってから
http://localhost:12345/ にアクセスするとredmineの画面が表示されれば、作業完了です!

【Vagrant】インストール方法
前提
VirtualBoxをインストールしていること インストール方法は【VirtualBox】インストール手順の記事をどうぞ
Vagrantってなんぞ?
WikiPedia先生を引用すると
Vagrant (ソフトウェア) 仮想機械の提供自体は、VirtualBoxをはじめとする仮想化ソフトウェアが行う。Vagrantは、これらソフトウェアが用意されているのを前提として、仮想機械の設定や立ち上げに特化している。このため、既存の仮想化ソフトウェア及び構成管理ソフトウェア(例: Chef(英語版)やSalt(英語版)、Puppet、Ansible)をラップしたものとみなすこともできる。
とのこと。
簡単に言うと、仮想サーバーを設定ファイルとかコマンドで操作できる
ということです。
何がいいかというと、設定ファイルを共有すればプロジェクトメンバー全員が同じ環境ができあがる。
環境構築にあほほど時間かけるより、Vagrantの設定をしっかり作るのがおすすめ。
と私は思います。
※レガシープロジェクトとかだと、バージョン合わせるのとかに便利かなぁと
ということでインストール手順から
Vagrantの入手
Vagrant公式HPからダウンロードします

私はWindows10の64itをダウンロード

インストール作業
ダウンロードしたインストーラーを実行

あとは通常にインストール


インストール後
インストール後は、Redmineでも入れてAPI叩いて遊ぼうと思います。 その環境構築手順はまた後日アップします。
Vagrantをもっと詳しく知りたい!という人
オライリー本も出ていますので、ぜひどうぞ
【VirtualBox】インストール方法【Windows10】
Windows10へのVirtualBoxインストール手順
前提
OS:Windows10 Pro 64bit
VirtualBoxについての参考書はこちらがおすすめ

インストール手順
インストーラーをダウンロード
VirtualBoxのダウンロードページから環境にあったものをダウンロード
今回はWindows hostsを選択

ダウンロードしたファイルを実行

デフォルトでインストール


完了画面
 スタートアップ画面が表示されたら無事インストール完了

あとは仮想サーバーを作っていきます
私の場合はVagrant(ベイグラント)で環境作成してみたいので、VirtualBoxの作業は以上です